Java First Program
We will use IDE (Integrated Development Environment) to write and run our Java program. There are different IDEs available for Java development, but we will use Eclipse which is one of the most popular and widely used.
Download and install Eclipse IDE for Java Developers from the Eclipse official website.
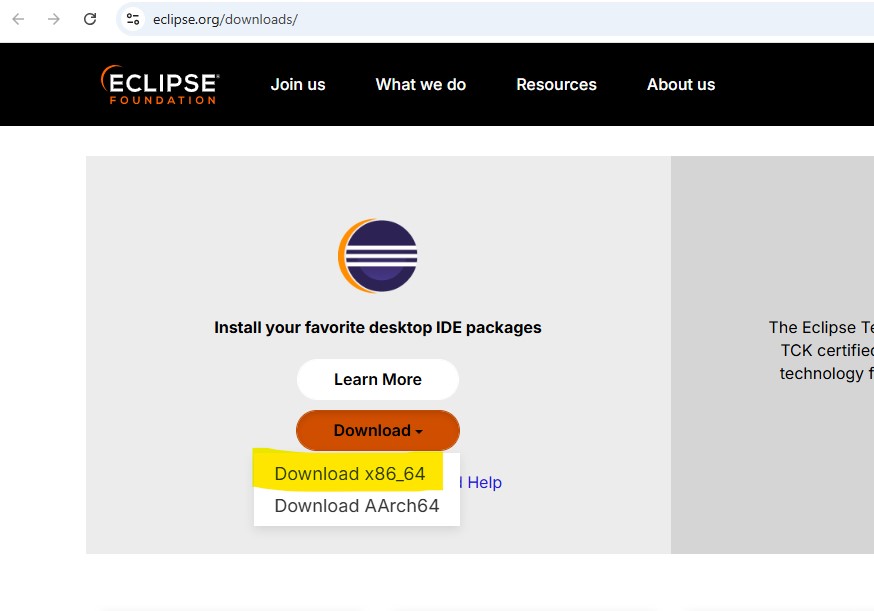
Or you can download for different operating system from the below link :
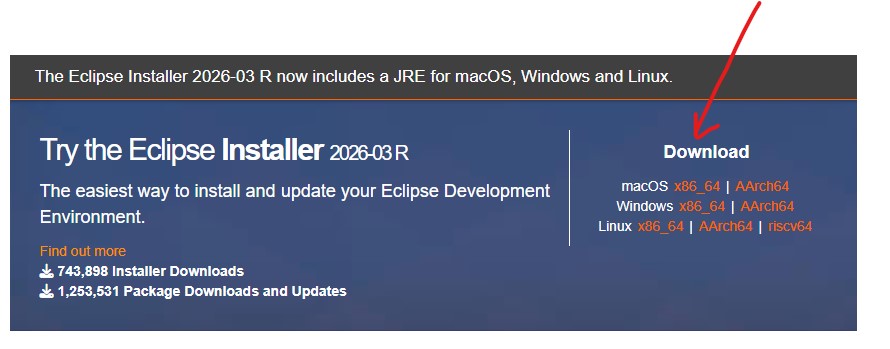
In the installer, select one:
- Eclipse IDE for Java Developers (most common)
- Eclipse for C/C++
- Eclipse for Web & JavaScript
- Eclipse Enterprise Java (Jakarta EE)
Congratulations! You have successfully installed Eclipse IDE for Java Developers. Now Launch it to start coding. You will see a welcome screen, just close it to open the main workspace.
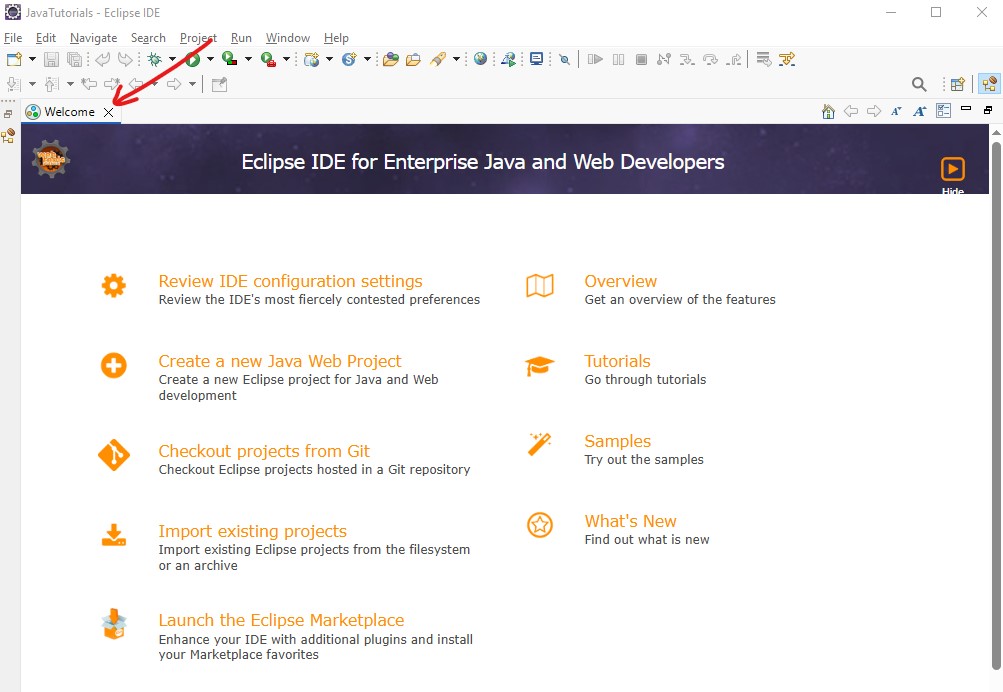
Create your first Java Project in Eclipse :
- Click on File (left top corner) → New → Java Project. if Java Project is not visible, click on Other and search for Java Project and select it and click next.
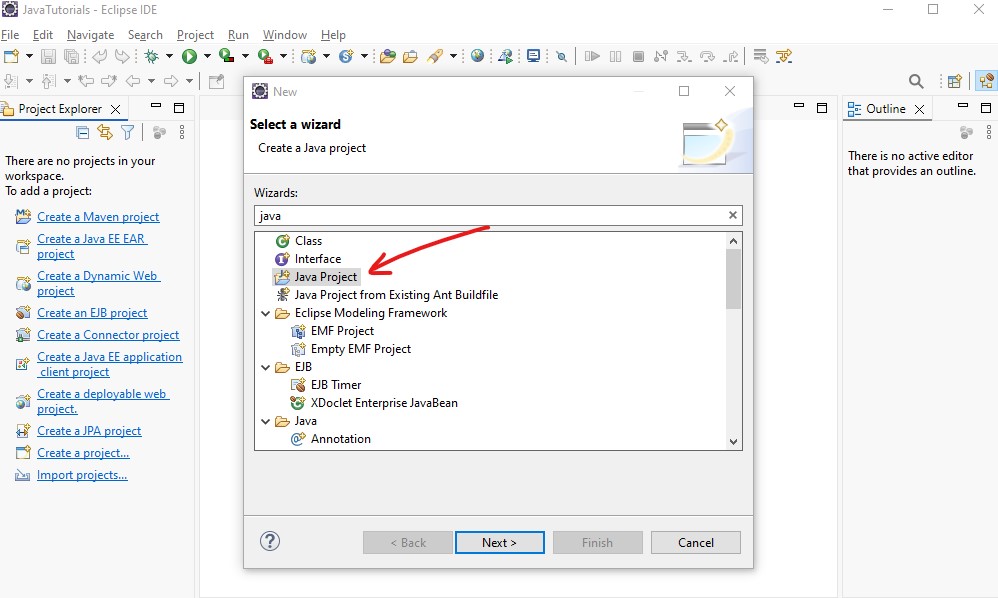
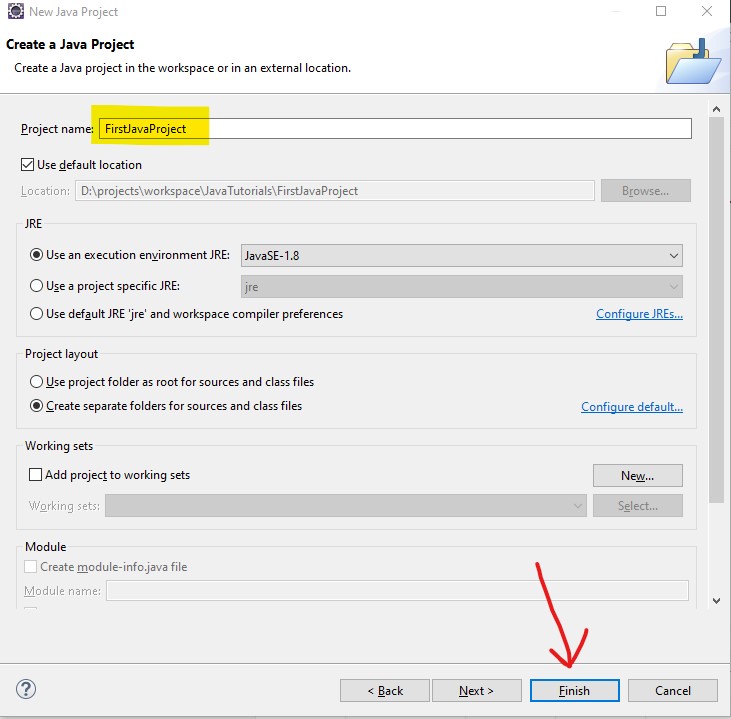
- Now you will see the New Java Project dialog, enter the project name (e.g., JavaFirstProject) and click on Finish.
3.Now Inside the project right-click on the "src" folder, click on "New" and select "Class" to create a Java class. provide class name (e.g., HelloWorld) and Package name (e.g., com.java.first.program) and click on Finish.
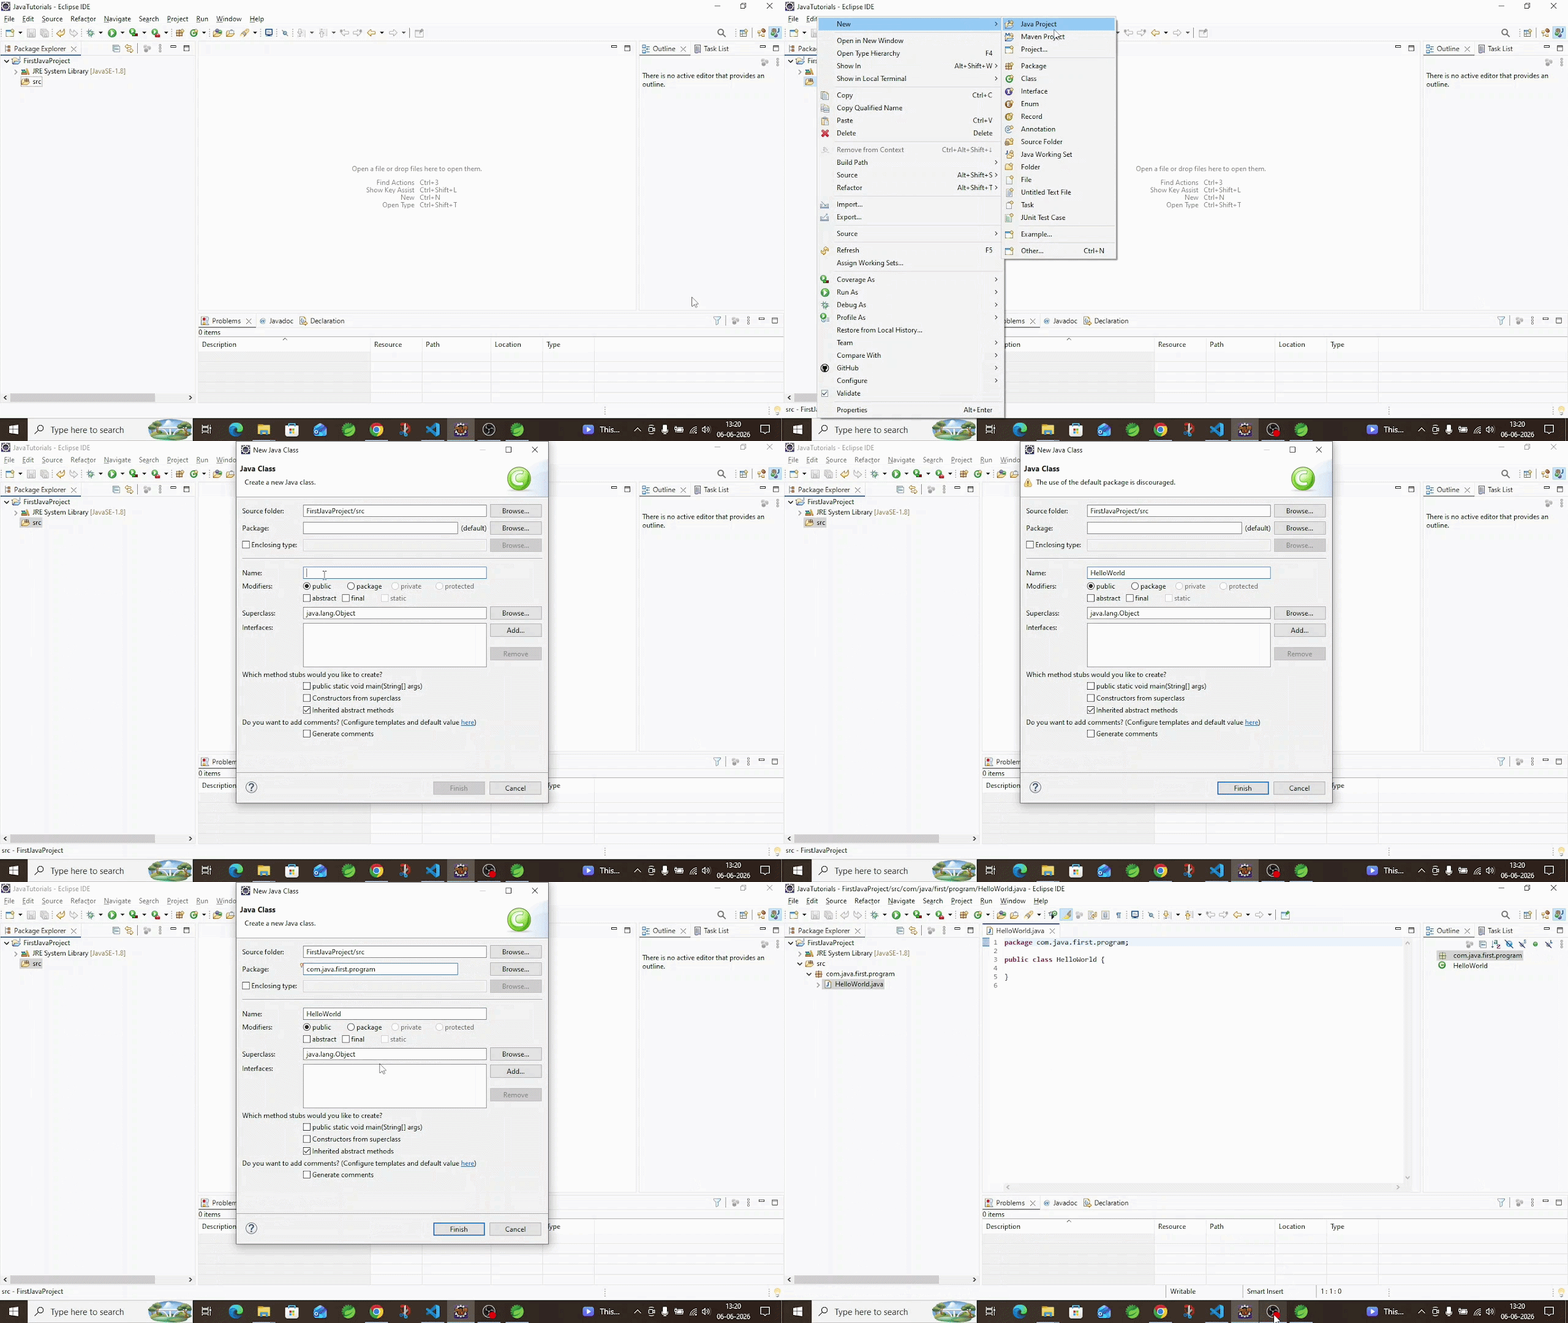
- Now you will see a new Java class file with the name "HelloWorld.java" inside the src folder. Now replace the code in the HelloWorld.java file with the below code and save it (Ctrl + S).
public class HelloWorld {
    public static void main(String[] args) {
        System.out.println("Hello, World!");
    }
}
Note : The file name should be same as the class name and should have .java extension.
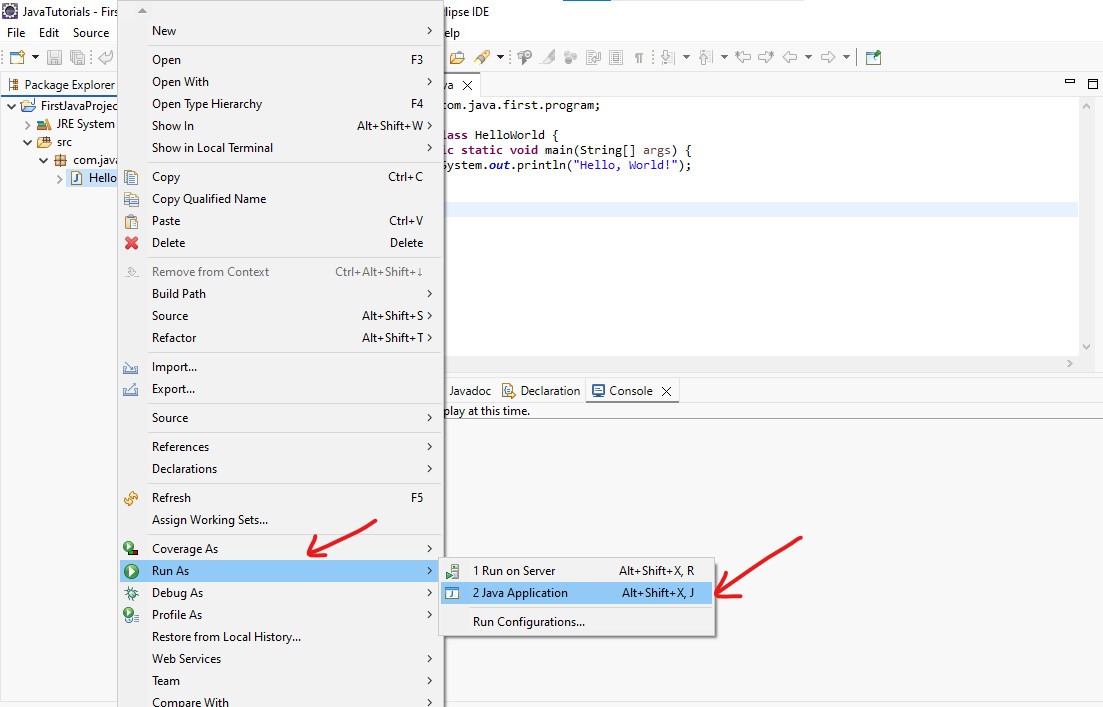
- Now to run the Java program, right-click on the HelloWorld.java file and select "Run As" → "Java Application".
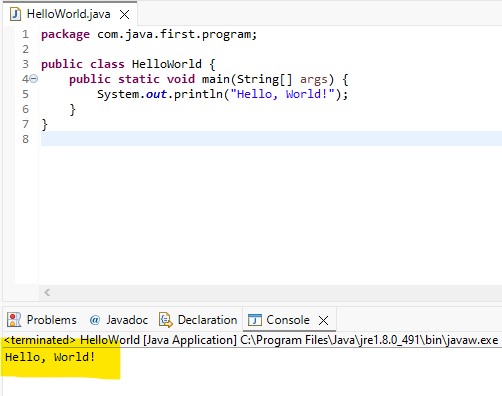
Great! You have successfully run your first Java program in Eclipse IDE. You will see the output "Hello, World!" in the Console tab at the bottom of the Eclipse window.
See you in next page....🙂